


Configuration guide Fanvil® V67
This configuration guide describes how to set up a Fanvil® V67 as an extension of your PBX and how to automatically display the Behnke Station's video on calls. We assume that the basic configuration of the Fanvil® has already been made and that the device is accessible via the IP address in a browser. We only describe how to register the Fanvil® with your PBX and setting up the video display. We also assume that the Behnke Station has already been set up as an extension of your PBX.
1. SIP registration
NOTE:This is just an example of the SIP registration. Registration and the required parameters can vary depending on your PBX or SIP provider. If in doubt, please contact your PBX's support.
-
First, start the Fanvils® web interface in your browser and log in with your admin credentials.
-
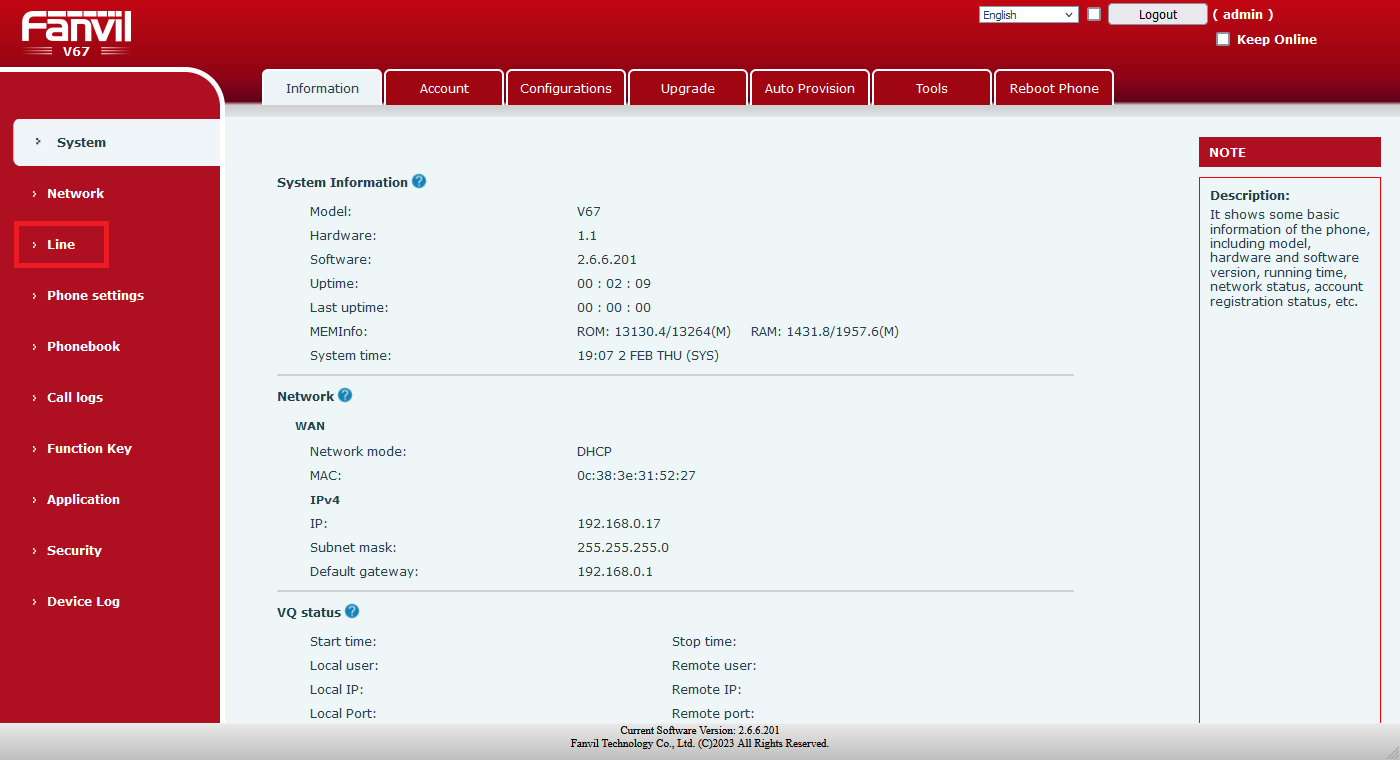
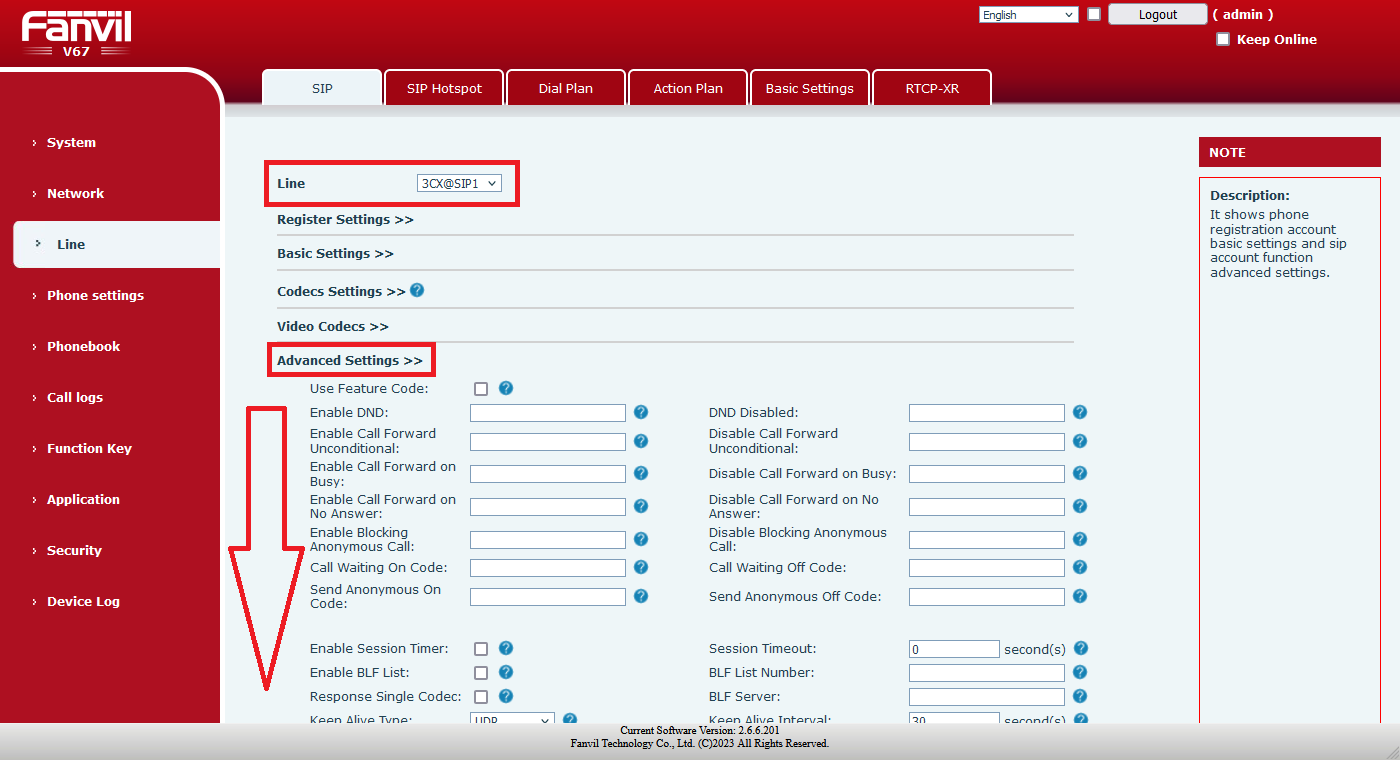
Then click "Line" in the menu on the left.
-
Select an unused line and fill in the fields with the SIP registration information of your PBX. Also make sure "Activate" is checked in the upper right corner. Then click "Apply" at the bottom.
Field Fanvil® V67 Value PBX Username SIP user name Display name Display name, arbitrary Realm SIP domain/realm Authentication User SIP user name Authentication Password SIP password Server Name Server name, arbitrary Server Address IP address of the PBX Server Port SIP port of the PBX 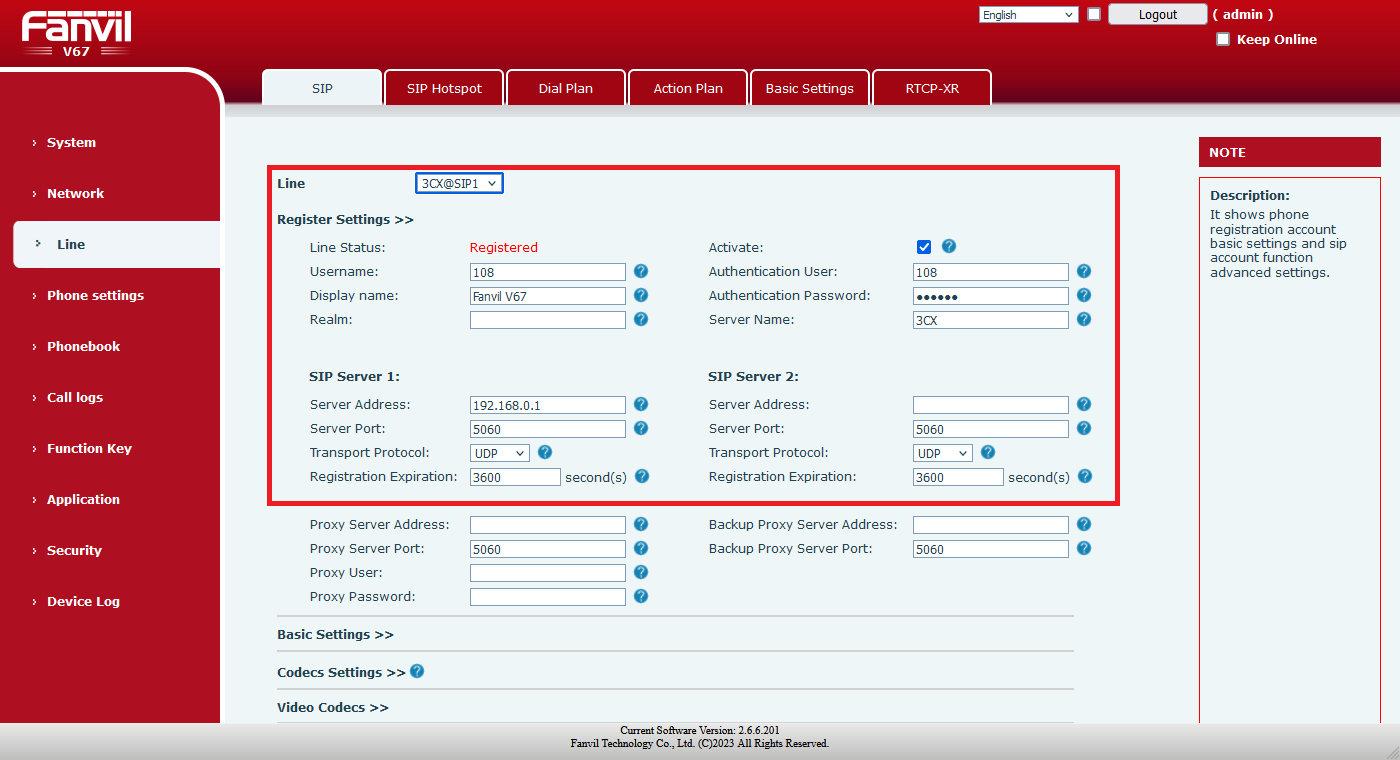
2. Direct SIP calls (for usage without PBX)
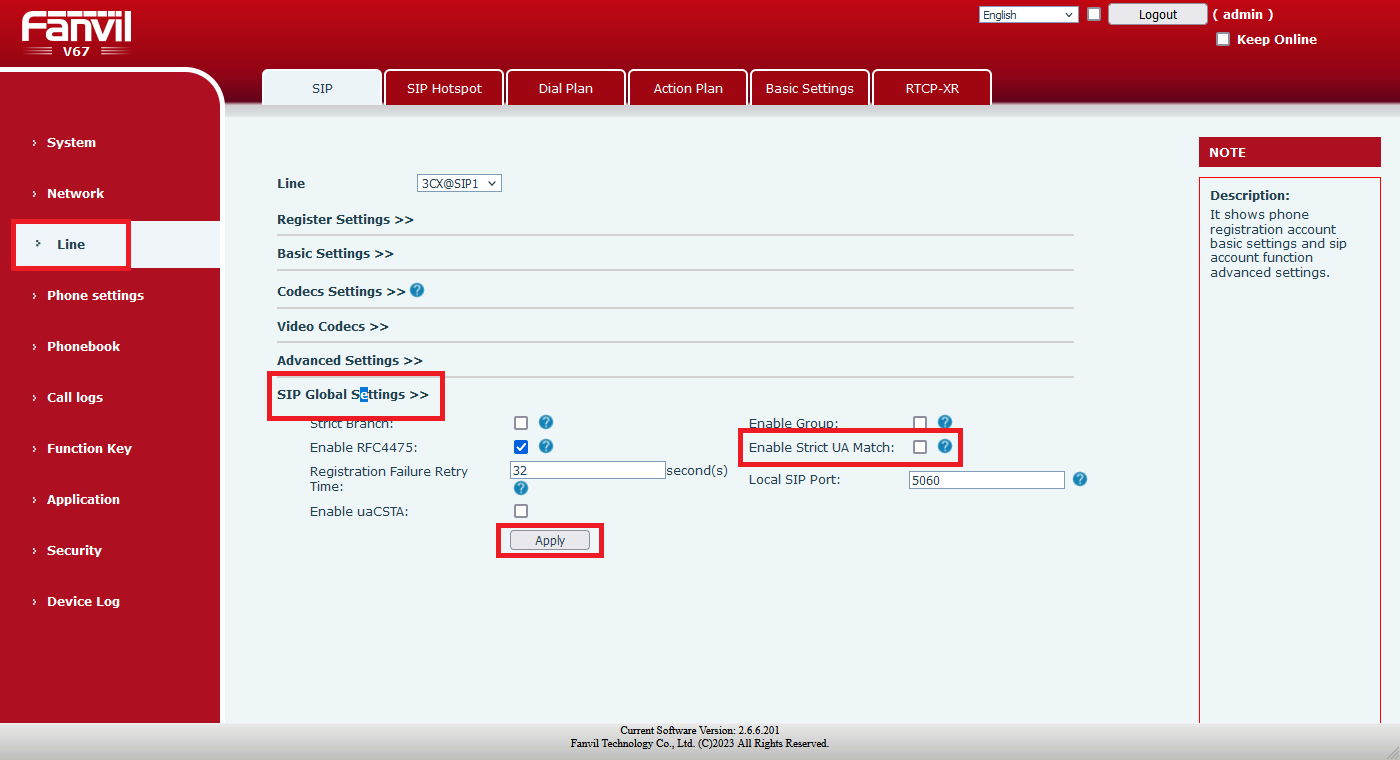
In order to be able to operate the device without a PBX, direct IP dialling can be activated. The steps described above are then omitted. To do this, simply click on "Line" in the menu on the left and then on "SIP Global Settings" at the bottom. Uncheck "Enable Strict UA Match".
The Fanvil® can then be called from the Behnke Station via direct IP dialling, as well as making direct IP calls itself. How to set up direct IP calls on the Behnke station is described in the following configuration guide: Direct SIP calls (for usage without PBX).
In order to trigger an IP direct call on the Fanvil®, simply dial the IP address of the Behnke station, replacing the dots in the IP address with *.
3. Setting up the video display for Behnke Stations with a system camera (SIP video calls)
NOTE:This function can only be implemented with Behnke Stations that have a USB camera or an IP camera integrated as a system camera. If you are using a standalone IP camera, please skip to step 4.
If the Behnke Station and the Fanvil® V67 are registered with your PBX or you are using direct IP calls, you just have to trigger a call at the Behnke station. After answering the call on the V67, the video is displayed automatically. It is also possible to display the video on the V67 before the call is even answered (early media). This feature is enabled by default on the Behnke Station. To enable it on the Fanvil® please do as follows:
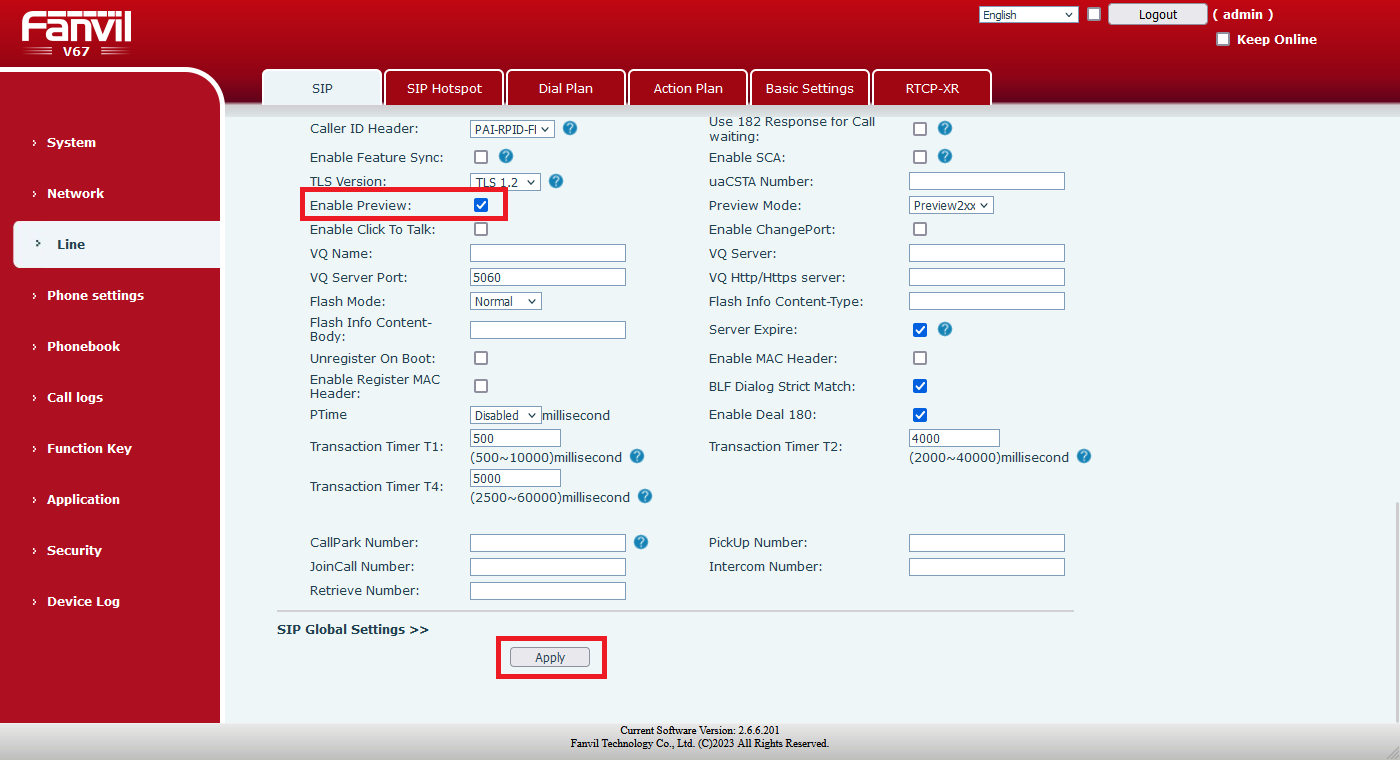
Select the "Line" you created on the Fanvil®, click on "Advanced settings" and set the "Enable Preview" option.
NOTE:Please note that this function can only be implemented with direct calls and on PBXs that support video as early media. If your PBX does not support this feature, you have the option of initiating a direct SIP call to the Fanvil® from the Behnke Station. The call is then not set up via the PBX, but directly from the Behnke Station to the Fanvil®. Please note that in this case no PBX settings apply to this call (e.g. call forwarding). How the direct call is set up on the Fanvil® and on the Behnke Station is described in step 2 above in this configuration guide.
4. Retrieving the video without a call
It is possible to display the video outside of a call. For this purpose, a camera can be set up in the Fanvil®, and the corresponding video can then be retrieved directly via a software button on the Fanvil®.
To do this, click on "Function Key" in the menu on the left. Here, select a free key from the list and select "Application" in the "Type" column. In the "Name" column you can set a label for the function key. The URL for the video image is then entered in the "Value" field. Then click on the Apply button below.
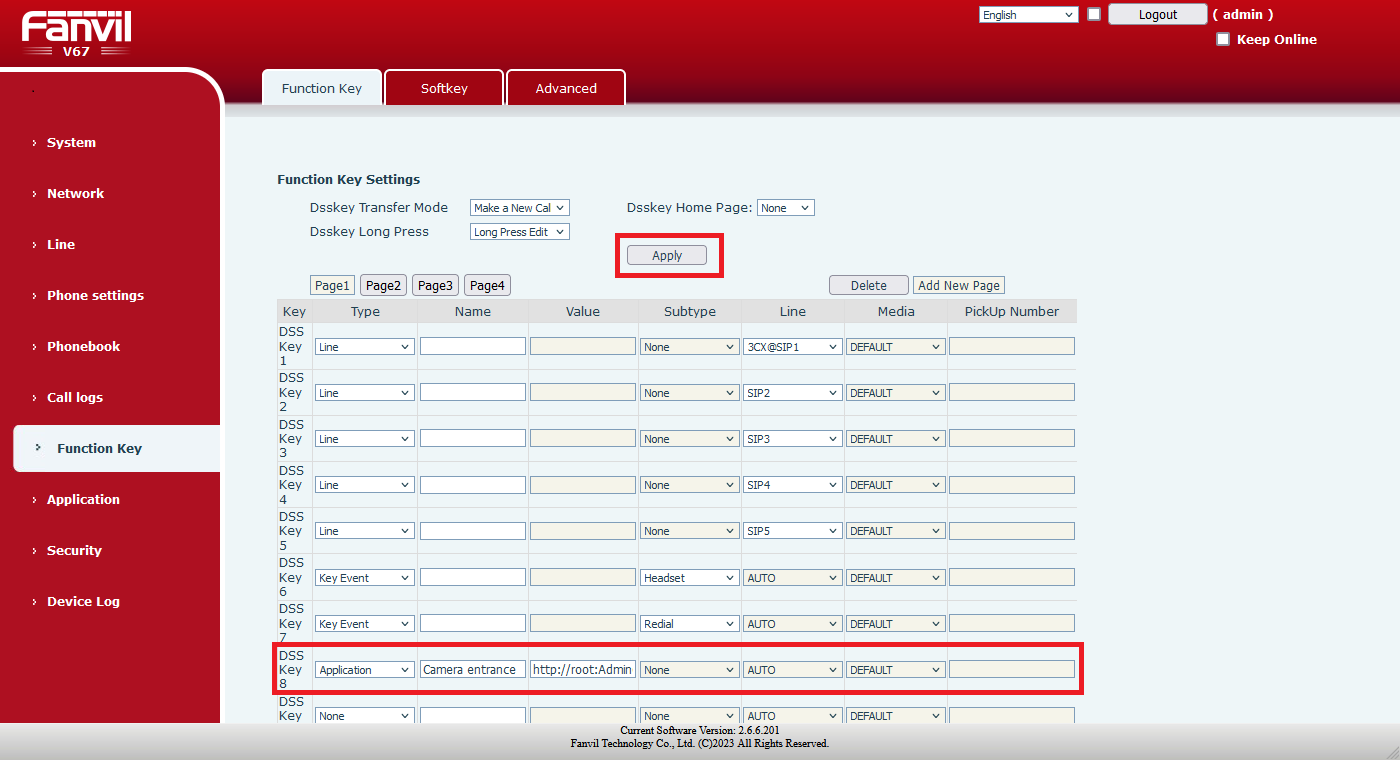
NOTE:You can find out the URL for the video via the link below. Please use the "URL MJPG-Stream" here. Camera URLs and credentials
This completes the video display setup. To call up the video image, just tap on the ... button at the bottom right of the Fanvils® display. An overview with the function keys appears. If you tap on the previously created function key, the video image is retrieved.
5. Setting up a door opener button
It is possible to set up a door opener button in the Fanvil®, which is shown on the display during calls. With this button you can activate one of the Behnke Station's relays.
-
To do this, click on "Application" in the menu on the left then on "Doorphone Settings" and then click on the
Addbutton.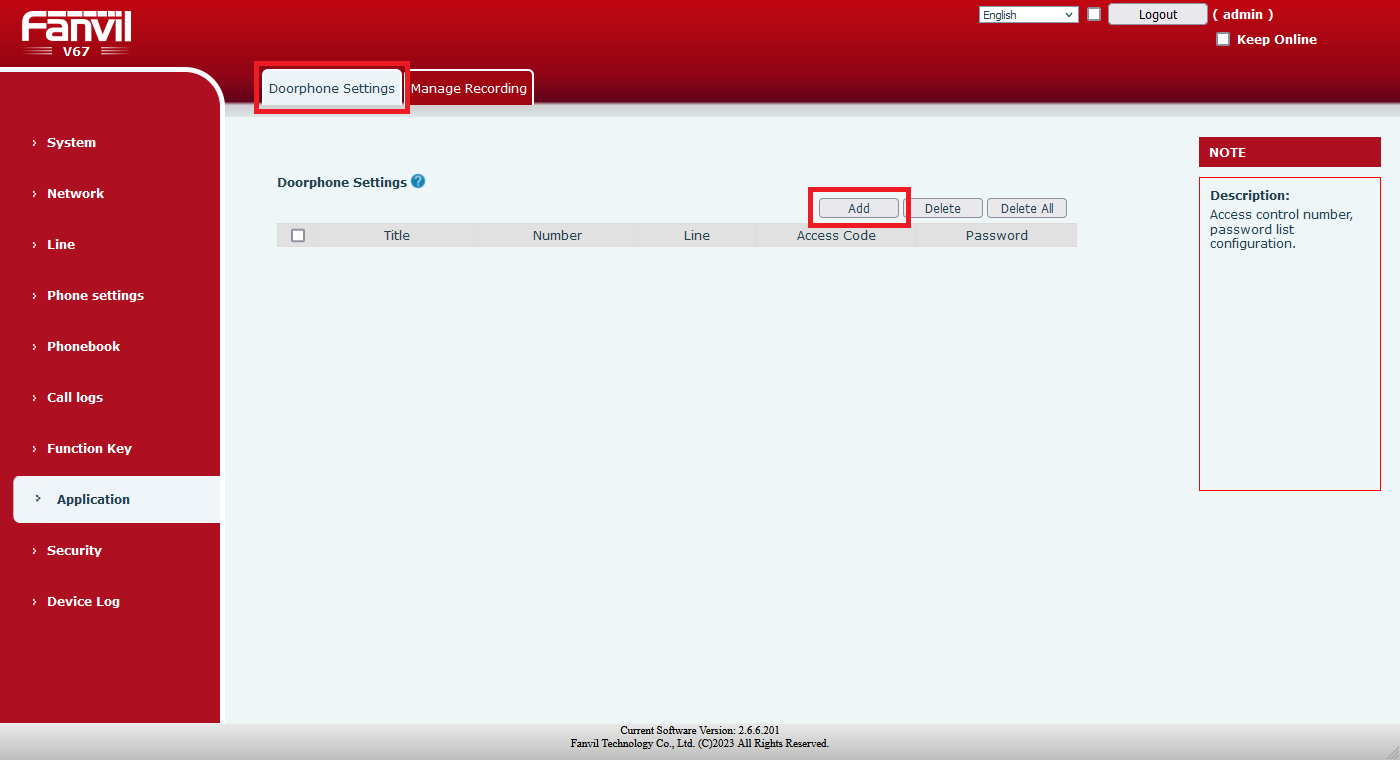
-
In the next window, fill in the fields as follows with the values of the Behnke Station and then click on the 'OK' button.
Field Fanvil® Value Title Arbitrary name Number Number of your Behnke Station Password Relay activation code followed by #Access Code Relay activation code followed by #Line Line for calls with the Behnke Station 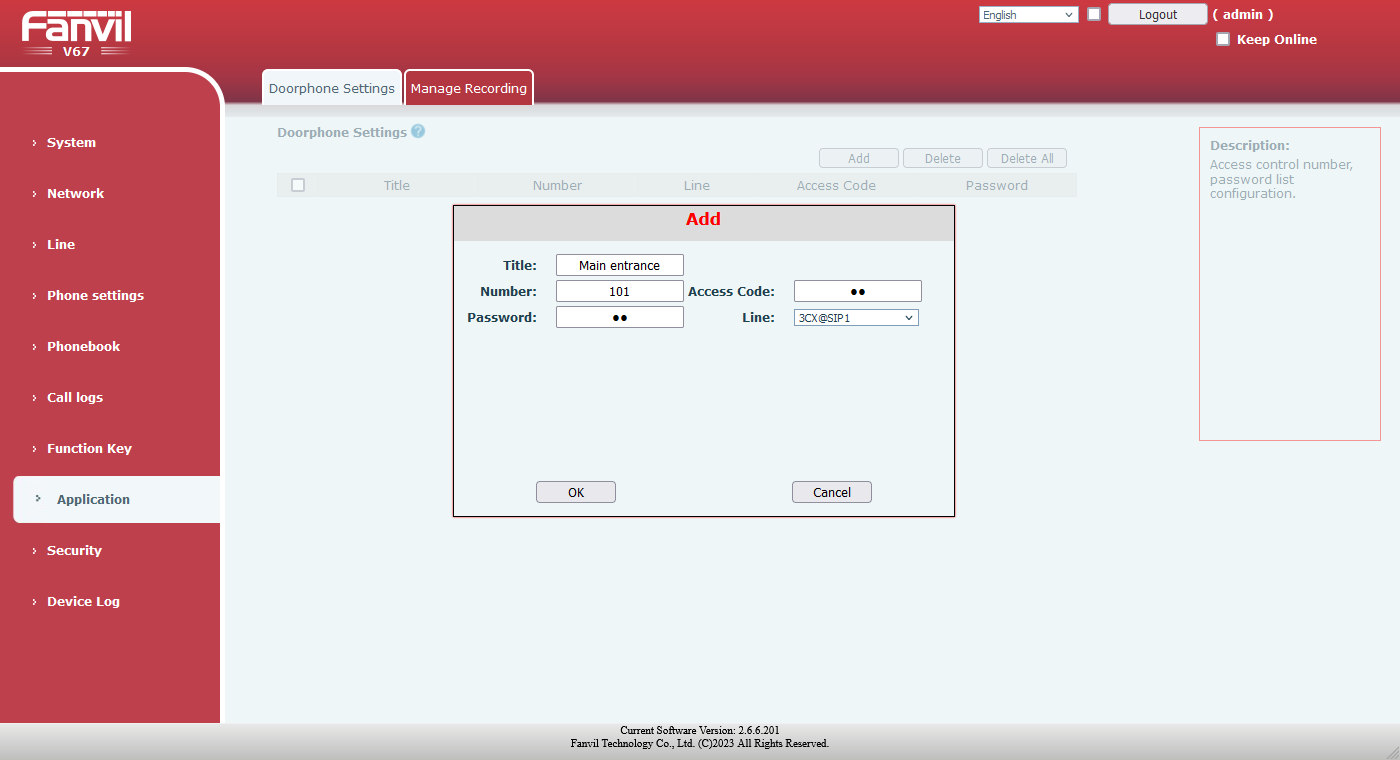
NOTE:If you are using direct IP dialling, simply enter the IP address of the Behnke Station in the "Number" field. If in doubt, you can simply trigger a test call from the Behnke station to the Fanvil®. The number or IP address that is then shown as the caller's number must be entered in exactly the same way in the "Number" field. In the "Line" field, simply select "Auto" when using direct dialling.